Showing posts with label Template. Show all posts

Tuesday, July 21, 2009

Life is a puzzle

Life is a puzzle
Photobucket
I am using the awesome artwork of Rion Vernon aka Pinuptoons his artwork is available HERE.
Please do not use this tube without the correct licence.
Thanx.
I am using template 24 from Maggie of Magsnificent Creations find it HERE
This tutorial uses DSB flux Bright noise, but if you don’t have that you can use noise that comes with psp.

This tutorial assumes you have prior knowledge of psp and its tools. No scrap kits are used in this tutorial.

ONTO the TUT
Open the template in psp duplicate (shift+D) and save the original for another time, delete the (c) layer, then resize ALL layers by 90%, then go to canvas size and change to 550x500, and re fill the background layer.

Find a premade tag using the same artist you have picked to do the tut with, copy it, then go to BOTTOM SQUARE layer selections ~ select all ~ selections float ~ de float then paste as a new layer, DO NOT move the copied tag to make it fit or the tag u now make will look distorted,
Follow the instructions above for the TOP SQUARE, BOTTOM PUZZLES, MIDDLE PUZZLE & TOP PUZZLE layers. After u have pasted the tag into all the selections you made delete the original layers leaving u with just the tag in place of the layers.
Find the TOP FRAME layer selections ~ select all ~ selections ~float ~de float, then go to plug ins find dsb flux and add the bright noise settings as below.
Photobucket
Do the same with the BOTTOM FRAME layer.
Then add the drop shadow below to all the layers except from the ‘picture’ layers.

Photobucket
Make a gradient using 2 colours from your tube, find the BOTTOM LINES layer, selctions ~ select all ~ selections float ~ de float, then flood fill with your gradient, do the same for the TOP LINES layer, then click on the top lines layer and merge down then add the same drop shadow.
Go to the background layer and add a new raster layer, invert your gradient and floodfill the layer and add a mask of your choice.

Add the tube of your choice and add the same drop shadow to it, re size all layers to your liking, add the (c) info, and the name u wish to use, i added eye candy impact gradient glow at the factory settings to the name.

(I also added the saying ‘Life is a puzzle’ but that’s up to you.)

Re size the tag to your liking and save as a jpeg.


This tutorial was written by thefishqueenandprincessofpinkdopsp.blogspot.com.
On the 21/07/09, this made for a template challenege on fantasy flight graphics and is not copied from anyone else, if there is a simualr one about then we are sorry but we did not do this intestinally.
Please DO NOT copy this tutorial in any part onto the web without our express permission, but feel free to text link only directly to this tutorial for ppl to do it.
Thursday, June 11, 2009

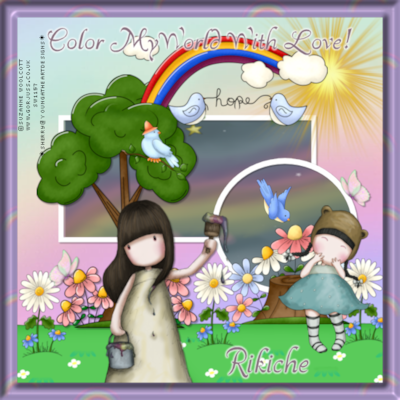
New tut with our template!


Heres a new tut "Color my world with love" written by Sherry from Young at heart designs.


You can find the tut and lots more of her gorgeous tutorials HERE.

Monday, May 18, 2009

Girly Template Freebie

I was playing around in psp and came up with this fun girly tag template.

I hope you have fun with it and as always i'd love to see your creations!


Download here.
Its much bigger in reality i just resized it to post up here :]

Thursday, May 07, 2009

Catch a falling star - Template

I lurve stars! So heres my new starry template. I hope you like it.
And if you make anything with it i'd love to see it!
Photobucket
Download Here

Sunday, May 03, 2009

Colours of the Rainbow

Colours of the rainbow
This is what we will be making
Photobucket
Or this if you animate
Photobucket

I am using the art of Andrea Young which was a freebie from CILM at Christmas; please do not use this image unless you have a licence to do so.

Template by me HERE
Muras clouds
HERE
Beckys mask 033
HERE
Xenoflex2 constellation (if animating)


The TUT

Download the supplies and open them in psp, canvas size 600X600. shift+D to duplicate my template, then close the original, delete the (c) layer and the background layer, add a new layer in its place and use a nice blue colour I used #30baf7 apply mura’s clouds with these settings

Photobucket


When u have applied this add mask and deform until it fits the tag nicely.


Select the rainbow layers one by one... selections ~ select all~ selections ~float ~selctions ~defloat then go selections ~modify expand by 1... new layer and floodfill with a rainbow gradient of your choice. Do this till all the rainbow layers are filled then delete the original layers.

Then add a drop shadow to each layer I used 1, 1, 50, 2 colour black.


Add your tube resize to your liking, and ad a drop shadow of 5,5,50,5 black to the tube.

Move the word art up slightly so the tube doesn’t hide it lol

Add your name and (c) info resize to your liking, and save as a Jpeg.


If you wish to animate read on

Merge all the rainbow layers together then duplicate x2 so you have 3 layers.
On the bottom layer apply xenoflex 2 constellation with the settings below

Photobucket

Then apply to the middle layer but hit the random seed button a couple of times, do the same for the top layer.


Then x off the top and middle rainbow layers, edit copy merged, go to AS paste as a new animation, X out that layer in psp and un X the middle layer then edit copy merged AS paste AFTER current frame then do the same again for the top layer, don’t forget to resize the animation, and save.


This tutorial was written on 28-03-09 by Steffy
It was inspired by my own template and is totally my own work, if it resembles any tutorial on the net then that’s a coincidence and not intentional
Please do not share the supplies online but send people here to download them.
Feel free to text link this tutorial, I would love to see your results, so please email them to us at the addy’s to the right :) We will soon be having a tut show off page and we will add them all there.
Thanx for trying this tutorial.

Friday, April 24, 2009

*New Tut* Spring flowers *

Spring flowers

Photobucket
This tutorial assumes you have prior knowledge of the workings of psp, I am using psp 9 cos I like that one, although there is no reason it can’t be done in other versions.

I am using the awesome artwork of Rion Vernon aka pinuptoons only available at CILM
Do not use this artwork without a licence to do so


Supplies

Scrap kit by Armazem Scraps called Spring time it’s her addition to a spring time blog train available HERE

Template 12 by Maggie HERE
the animation I used is HERE I cant remember where i got this from if its yours let me know and i will either remove it or add your (c) info to it :]


Onto the tut
Open the template in psp shift + D to duplicate then save the original one to use again.

Image canvas size increase to 650X600 add a new layer and send it to the bottom, fill with white.
Find the grey rectangle layer selections ~select all ~selections float ~ defloat add a new layer then go to the scrap kit, copy and paste paper 6 INTO selections, select none then delete the original rectangle layer. Find the Grey flower stem layer selections ~ select all ~selections float ~ selections defloat grab paper 13 paste as a new layer selections invert then press delete on your keyboard, making sure you are on the paper layer, selwections~select none add a drop shadow.

Find the white frame layer and add a drop shadow to that.

Fins the grey flower layer selections ~ select all ~selections float ~defloat and add paper 1 as a new layer. Selections ~ invert and press delete on your keyboard. Again making sure you are on the paper layer then delete the original flower layer and add a drop shadow to your new flower. Add a drop shadow to your flower frame layer.
Go to the circle layer delete that and the frame and in its place add element 10 resized by 90% add a drop shadow.

Resize the sunshine element by 60% x2 and place on the right hand side, see mine for placement.

Go to the bottom layer the one you filled in white and add paper 7 as a new layer re size to your liking and add a mask. I used cbj mask 05 which is in the supplies.
Merge group.

Add your tube as a new layer at the very top and add a drop shadow to it.
Add your name and (c) info.


To animate
Edit copy merged and paste in AS, as a new animation edit duplicate, find the animation I included in the zip and go edit select all edit copy back to your tag edit select all edit paste INTO selected frame.
Resize to your liking, and save as a gif,


This tutorial was written by steffy 11/04/09
Any similarity to other tuts is a co-incidence; feel free to text link only to this tut.
But do not claim it as your own cos its not yours its mine

Monday, April 20, 2009

Template - Seeing Spots

I was playing around in psp so much that i got spots in my eyes lol
So i thought id make it a useful experience and make a template based on it.
Hope you like it and if you do create anything with it id love to see it!

Photobucket

Download Here

Friday, April 17, 2009

Toxic Shock *new tut*

TOXIC SHOCK
Photobucket

This tut was inspired by Laura’s fab template,

Artwork (c) Pinuptoons. Do not use this tube without a valid licence to do so, if you require this tube and licence go to CILM.

This tut also assumes you have prior knowledge of psp and its tools, I am using psp 9 to write this tut cost thats the only one I like, you can of course use which ever version you prefer.


SUPPLIES

Template HERE

Scrap kit is called Trendy Girl and is the fab work of Karla at Lacarolita’s Designz and can be found HERE – don’t forget to say thank you for this brilliant scrap kit.


ONTO THE TUT

Open and duplicate the template (shift + D) and save the original for use again. Delete the (c) layer. Increase the canvas size to 700X700

Go to the template and find layer square frame ~ selections ~select all~ selections float-defloat ~add paper 4 as a new layer selections invert and click delete on your keyboard, then delete the original layer.

Repeat the steps above with layers t rect frame, b rect frame, t rect sm frame, b rect sm frame. Then add a drop shadow to each layer i used 2,2,50,5 black.


Go to the square inner frame ~ selections ~select all~ selections float-defloat ~add paper 1 as a new layer selections invert and click delete on your keyboard, then delete the original layer.

Find the bot rect layer and ~ selections ~select all~ selections float-defloat ~add paper 7 as a new layer selections invert and click delete on your keyboard, then delete the original layer. Repeat for top rect layer.

Find the bottom and top toxic layer and add the same drop shadow.
Find the t rect sm layer ~ selections ~select all~ selections float-defloat ~add paper 7 as a new layer selections invert and click delete on your keyboard, then delete the original layer. Repeat for b rect sm layer.

Add the same drop shadow to the addicted and but don’t... layers.

Find the Right Arrow layer ~ selections ~select all~ selections float-defloat add a new layer and flood fill with #bd143b. Find the right arrow frame layer and ~ selections ~select all~ selections float-defloat add a new layer and flood fill with #ffffff . Repeat with the left hand arrow, rename these layer red1 and red 2** BUT DO NOT** delete the original arrow layer! We need that for the animation.

Add the same drop shadow to the frames of the arrows, are you still with me lol


Find the tri frame selections ~select all~ selections float-defloat add a new layer and flood fill with #ffffff then find the triangle top ~ selections ~select all~ selections float-defloat add a new layer and flood fill with #bd143b and delete the original layers.

Go to the background layer and add a paper or colour of your choice and mask of your choice.

Click onto the very top layer, and add your tube as a new layer, add your (c) info and the name u wish to use,


To animate

find the layers you name red 1 and red 2 and X out copy merged and open animation shop, paste as a new animation un X the 2 red layer copy merged in AS paste after current frame change the animation properties to 15 resize to you liking and save as a gif.

All done!

This tutorial was written by Steffy on 17/04/09 and was made out of my head through inspiration from my partner in crime Laura!
No not copy this tutorial but feel free to link anyone here to our blog to download the supplies,and don’t forget to show us what you have made

Monday, April 13, 2009

Freebie Template - Toxic & Slideshow news

A quick and very random freebie.
Photobucket
I made this as i had the Britney song in my head and was feeling in a psp mood lol
As always if you make anything with it id love to see the results!
Download
here.

Now onto the slideshow!
Im putting together a slideshow to pop on the blog so its easier to see whats here and what isnt (yet lol).
If you've made a tag or anything else with anything from the blog please email it or bung us a link to it in the shoutbox and ill try to include it.
Obviously only do this if you want us to add it, i mean heck, im not bullying you into giving me your tags - i hope lol
The email is somewhere on the blog but if not
pinkprincess5681@gmail.com its here too :]

Sunday, April 12, 2009

Certainly Cancer

Certainly Cancer
Photobucket


This tutorial assumes you have prior knowledge of psp and its tool. This tutorial was written in psp9. I am using the awesome artwork of Rion Vernon aka pinuptoons. His artwork is only available from CILM. Please do not use this image unless you have a licence to do so.

Supplies needed

Cancer template

My supplies HERE (including template)

I am using Maggie’s Sand thank you Maggie, you can find Maggie’s awesome work

or


Onto the tutorial

Open the template in psp shift+D to duplicate and close the original, for later use.
Open all other supplies in PSP.

On the template copy and paste Maggie’s sand as a new layer and place at the bottom of the shell, go to the inner layer of the template selections ~ select all ~ Selections float ~defloat ~ copy the paper as a new layer (or feel free to use your own) selections ~ invert and making sure you are on the paper layer hit delete on your keyboard. Select none.
Go to the outer layer and add a drop shadow of your choice I am using 2,2,50,5 black.

Copy and paste your tube as a new layer and place where you like, see mine for my placement. Resize the sandcastle by 60% and place to your liking or again see mine for placement. Find the nautical accessories and copy and paste elements to your liking.


Go to the paper 5 layer and add as a new layer just above the background layer. Re size by 80% and move up a little, then apply mask KRD mask 9 and merge group. Grab your deform tool and deform it so it looks like sky.


Add a drop shadow to all element layers but NOT the sand!

Add your (c) info and name.

To animate

Copy merged, and open AS paste as a new animation. Duplicate so you have 2 identical layers find the animation I provided and edit select all ~ edit copy then back to you tag edit selection all ~ edit paste into selected frame place to your liking once again see mine for placement.
Re size to your liking and save as a gif.
This tutorial was written on the 11/04/09 By Steffy, any likeness to other tuts is a coincidence and not done to cause upset. Fell free to text link only to this tut, and remember our TOU.
thanx

Friday, April 10, 2009

Easter Freebies

2 new Easter Freebies for you today

Hoppy Easter Template. If you use this please come back and show us what you have made :)

Photobucket

Download it HERE

And

Photobucket

Download them HERE

Sunday, March 29, 2009

Typical Taurus Tutorial

Typical Taurus

A tutorial written by Laura aka Pink Princess on march 29th 2009.


For this tutorial you will need -
My typical taurus template included in the supplies.

A tube of choice. Im using a gorgeous taurus tube from Mariya Nikiforova if you want to use the one im using you must purchase it from MPT first.

A scrap kit of choice or the one im including which is Dusty Delights by Fee of Scrappy Dayz.
Or if you prefer just choose some colours to match your tube :].

Toadies - what are you.

Font of choice or the one im using which is a freebie called "Never let go" included in my supplies.

Optional for your name/text - Eyecandy 4000 gradient glow.

My supplies.

Ok on to the fun stuff!

Open your supplies in psp and open up the tube your going to be using.

Activate the template and press shift+D to duplicate. Close the original and delete the info layer from the remaining one.

Activate the inner circle layer, select all, float, defloat, expand by 1 and floodfill a dark colour from your tube. Deselect.

Activate the taurus frame layer, select all, float, defloat, expand by 2. Copy and paste paper 1 from Fee's kit as a new layer (or a paper of your choice). Selections, Invert, hit delete on the paper layer. Deselect. Delete taurus frame layer.

Activate the inner taurus layer. Select all, float, defloat, expand by 1. Copy and paste paper 4 from the kit. Selections, invert. Press delete on the paper layer. Deselect. Delete inner taurus layer.

Follow the same steps above for the rectangle inner, rectangle outer and TAURUS layers. Either copying and pasting papers or floodfilling with complimentary colours.

Ok now activate the bull layer. Colourise him to match your frames, i made mine a nice deep pink like the inner circle.
Resize him by 84% once, and again if he looks a bit big lol i forgot how many times i resized, but it wasnt more than twice. Now duplicate this layer a few times so you have bulls all inside the inner taurus frame. Mirror a few for prettyness. Then merge all the little bull shapes together. Once merged move this layer down so its just above the inner taurus frame.

Activate the inner taurus frame and select all, float, defloat, expand by 1, invert. Activate the bull layer and press delete. Deselect.
Change the blend mode of this bull layer to dodge.

Copy and paste your tube as a new layer. If your using a laying down tube like mine place it so its above the TAURUS text layer but below the typically layer. Resize to your liking and add a drop shadow of choice. I used H+V 2 opacity 52 blur 6 black.

Go back to the scrap kit, copy and paste a frame of choice, i chose the pink one :].
Image, rotate, free rotate, left 90.
Resize it by 86% and place it as mine.
Duplicate this layer and on the original, not the duplicate go to Effects, Toadies, What are you? with both X and Y on 20.

Activate the Typically layer, select all, float, defloat, expand by 1 and then change your foreground to either a patern paper or a colour of choice and activate your brush tool. Brush in gentle strokes over the selected text. Dont cover all of it yet. Change your foreground to a complimentary colour/paper/pattern and repeat the brushing until all the text is covered.

Now add your © info and any license numbers needed.
Add your name/text and resize/crop to your liking.
Add drop shadows to frame layers and any others you like.

If you feel it looks naked without a mask feel free to add one now :].

Thats it we're done!
I hope you enjoyed this tutorial and thanks for giving it a go!

New Template - Taurus

This is the first in a new set of zodiac templates we'll be making so if you cant think of a taurean friend to use it for do keep checking back for the other 11 signs :].Photobucket
Download HERE

Saturday, March 28, 2009

Freebie ....Template 2

Photobucket

DownLoad HERE

Wednesday, March 25, 2009

Looking For Rainbows

Looking for Rainbows


A tutorial by Laura aka Pink Princess ©2009

Photobucket


The ideas behind this tutorial are completely my own from my own little head and any resemblance to any other tutorial is purely coincidental.


I have used the gorgeous art work of Marco Guaglione. If you would like to use the same image you must have a license with My PSP Tubes. This tube was a freebie but these are only available for use with your license number so please visit MPT to get one before using this artist’s work, thanks :).


Ok on to the fun part!


You will need -

Rainbow template from my blog.


While there also snag the rainbow wordart or you can recolor the word art that comes with the template - it’s up to you.


I have used Vix mask 44 which you can download from her site - here scroll right to the bottom of the page, i promise it is there hehe.


I’ve also used papers and colours from Steffy’s debut mini kit “little girls’” which can be found here.


You will need eyecandy 4000 hsb noise for animating or you can create your own animation effect.

Ok now we have everything let’s get going!


First open up the supplies in psp and minimise the mask and any tube you are using for now.


Activate the template and hold shit+D to duplicate. Close the original and delete the info layer from the remaining template.


Activate inner circle layer, select all, float, defloat, expand by 1, now either copy and paste a paper of your choice or flood fill a colour of choice. I used paper 5 from the kit. Selections, invert, on the paper layer press delete. Delete inner circle layer. If you flood filled do not delete this layer!! Deselect.


Activate sun layer, select all, float, defloat, expand by 2, floodfill a nice bright yellow. Don’t deselect yet! Go to effects, texture effects, textures, then choose a nice papery texture for the sun. Now deselect.


Activate the circle frame, select, float, defloat, expand by 2, and either paste your paper or floodfill with a complimentary colour. If you paste a paper don’t forget to invert and delete on the paper layer. Deselect.


Activate Rainbow 1, select, float, defloat, expand by 1, floodfill a colour of choice, deselect. Repeat for rainbow 2-5. Now hide all layers except for the 5 rainbow layers and merge visible. Unhide other layers.


Activate rainbow layer, adjust softness, soften. This just gets rid of any sharpness left by floodfilling.


Activate left heart, select, float, defloat, expand by 1, floodfill a nice medium pink colour. Deselect. Repeat for Right heart. Change the blend mode on both these layers to Colour. You might notice some rainbow poking through into the back of the hearts. If you do take your eraser tool, size 10, hardness around 50, activate the rainbow merged layer and carefully delete anything showing through the hearts.


Take the downloaded word art and copy and paste on to your canvas. Delete the word art that came with the template if you are using the downloaded one. If you are recolouring the wordart that is on the template do that now. To make the downloaded wordart fit exactly, take your deform tool and slowly stretch it out to shape. Once finished adjust, sharpness, sharpen.


Now go to canvas size and change it to 650 x 650. Activate the background layer and floodfill white. Add a new layer above this, flood fill this layer with a colour or gradient of your choice. I used the basic rainbow gradient in psp set on radial.


Layers, new mask layer, from image. Find the Vix 44 mask or the mask you are using and apply with luminance checked. Right click this layer in your layer palate and merge group. Set the opacity down to around 30 and duplicate for a total of 3 layers.


On the first go to effects, plug ins, EyeCandy 4000 and choose hsb noise with these settings

Photobucket


– apply.


Repeat for the other two mask layers but press the random seed button on each before applying.


Now take the tube you are going to be using. Copy and paste it as a new layer, ensuring its above the sun layer but below the frame. Resize it to suit and then click inside the circle frame with your magic wand. Modify expand by 5, invert, on tube layer, delete, select none.


Duplicate this tube layer and on each go to adjust, softness, soften. Then change the blend mode on both to Hard Light.


OK are you still with me?lol


Now it’s time to add any © and license numbers plus your taggers mark if required.


On to the name.


Take your preset shape tool on elipse, background nil, foreground something clashing like black or bright purple and line width on 3ish. Draw out an elipse shape that fits just inside the circle frame. When you’re happy with the shape and size go to image, flip and move it back into position at the bottom of the frame.


Take your text tool, choose font, colours etc and type out your name. It should be appearing the same way as mine, on the inside of the frame. Once your happy with the size and placement of your name click the little + symbol in the layer palate next to the text you just created and x out the elipse layer. Then convert to raster.


Add any drop shadows, effects, embellishments of your choosing now and resize/crop to your liking.


X out the two top mask layers and right click on your image, select copy merged. Launch animation shop and paste as new animation.


Back to psp, X out the bottom mask layer, un X the middle mask layer, right click, copy merged, over to animation shop, paste after current frame.


Back to psp again x out the middle layer, un x the top mask layer, right click, copy merged, animation shop, paste after current frame. Now view your animation! Don’t forget to save and do any more resizing if needed.


Phew that took a lot of explaining but yay my first ever tutorial is written. Thank you for taking the time to do it and I’d love to see your results :D

Tuesday, March 24, 2009

Rainbow Template - Freebie!

The first template offering.
I made this as i have an obsession with rainbows at the moment. I hope you like it!
Please leave a comment if you download.
Any problems please email us and we'll try to sort it out.
The zip file includes psd format and psp format and a copy of the TOU.
Photobucket

Download
HERE