Saturday, June 20, 2009

I'm a star!

I’m a Star!
Photobucket
This tutorial assumes you have prior knowledge of psp and its tools. I am using psp 9 to do this tut cos that’s the one I like best.
I am using the awesome artwork of Sin
Available only from CILM please ensure you have the correct licence to use this artist feel free to use another artist/tube.

Plugins required to do this tut
Eyecandy 4000 Gradient glow
Art media effects – comes with psp 9

SUPPLIES
Starry eyed scrap kit from melissazcreationz HERE
Template 20 also from melissazcreationz HERE


ONTO THE TUT
Open your template, Shift + D to duplicate now save your original one for use later.
Delete the (c) layer. Re-size to 650X650 u will see the background layer now needs a bit of extra filling so do so in white.


Find the rectangles layer selections~ select all ~ selections ~ float ~ de float, add a paper fop your choice as a new layer, and colourise to match your tube (if needed.) Duplicate this layer then click on the original rectangles layer, go to adjust ~ blur ~ gaussian blur ~ Radius of 15. Then go to effects art media effects ~ brush strokes with these settings .

Photobucket


Then add a drop shadow of 2,2,50, 5 black to the top rectangle layer not the one u just blurred, repeat this drop shadow but change the settings to -2,-2,50,5, black.


Find the circle layer selections ~select all ~ selections float ~ de float add another paper as a new layer selections~invert ~ click delete on your keyboard to get rid of the paper and just leave it inside your circle, then delete your original circle layer.
Find the dotted circle layer sections select all selections float de float then floodfill in a colour of your choice.


Find the smaller stars layer selections float defloat and add a paper of your choice delete the original layer. Duplicate this layer, and bur as above, and add the art media effect as above changing the colour to suit your tag then Add a drop shadow of 2,2,50,5 black to the top layer.


Finds the LG star selections select all float and defloat adding another paper selections invert and click delete, then add a drop shadow of 2,2,50,5 to this layer. Find the stars dotted layer and add the same drop shadow


Find the circle frame layer and go to effects ~ plug ins eye candy 4000, gradient glow, and use the settings below.

Photobucket

Photobucket


Go the very bottom layer and add raster 23 from the elements as a new layer.
Click on the very top layer and add your tube as a new layer add drop shadow as before, add your name and (c) info, re size to your liking.


I hope you enjoyed this new tut written by Steffy of thefishqueenandprincessofpinkdopsp.blogspot.com. On 20/06/08
It was entirely outta my head so if it’s similar to others then no problem I have a weird way of thinking lol,
Please do not copy this tut in any part anywhere on the net without my express permission, BUT feel free to text link ONLY to this tut in your group, do no copy and paste my example cost that’s bandwidth theft.




Monday, June 15, 2009

Beach Babe


Beach Babe!

Photobucket

I am using the awesome artwork of Rion Vernon aka Pinuptoons, only available at CILM please ensure you have the correct licence to use his work.

SUPPLIES
Template 56 from melissazcreationz HERE
Scrap kit Beach babe kit also from melissazcreationz HERE
This tutorial assumes you have prior knowledge of PSP and its workings.


THE TUT
Open the template shift +D to duplicate, and delete the (c) layer, add a new layer and send it to the bottom, flood fill with white.

Find raster 5, Selections ~ select all ~ slections ~float ~ selections defloat, add a paper of your choice as a new layer, selections ~ invert and ensuring that you are on the layer u just pasted click delete on your keyboard, then go back to raster 5 and delete. Repeat this step for the next 3 layer, (the 4 background rectangles) then merge these layers together and add a drop shadow of 4,4,40,4 colour black.


Find raster 4, and repeat steps above with another paper and add drop shadow as above.


Find the BEACH layer repeat the steps above adding the sand paper as a new layer, add the same drop shadow and ensure you have deleted the original layer.
Find the babe layer selections select all selections float ~defloat flood fill with black and add same drop shadow.


Find the sequin layer, paste as a new layer onto your tag, duplicate. flip and mirror then merge down and place this just above your background layer.
Add elements of your choice.


Add you tube as a new layer, Then find the summertime layer from the kit resize by 80% add as a new layer and drop shadow as above, close of the bottom layer and merge the rest together, add your (c) info and save as a jpeg, after you have added your name lol. I always re size before adding the (c) to make sure that is still readable as the TOU of CILM state.


This tutorial was written on the 15/06/09 by Steffy of thefishqueenandprincessofpinkdopsp.blogspot.com. It cannot be ripped apart and /or copied in any part elsewhere without my express permission. Feel free to text link only to this tutorial, this tut is outta my head so any similar ones is just a coincidence.

Saturday, June 13, 2009

Splish Splash Splosh

Splish splash splosh

Photobucket

Supplies

I am using the awesome kit splish splash slosh kit from Seaschell available HERE

Vix mask 44 HERE

This tutorial assumes you have prior knowledge of using psp and its tools, I used psp 9 to write this tut,although i see no reason it cant be done in other versions :)

Onto the tut.
Open a new image 600X600 floodfill with white.

Open element 52 ( green circular frame ) resize by 70% then by 90%. Paste as a new layer.
Find paper 2 and go to effects~plugins~muras clouds with the settings below.

Photobucket

Now copy and paste this as a new layer, click the frame with your magic wand select inside the frame and so to selections~modify by 4 then back to your paper selections ~ invert and press delete on your keyboard, then make sure the cloud layer is underneath the frame.

Find the sand element and resize by 70% X 2 paste as a new layer and place at the bottom on the frame, then again find the frame layer using the magic wand inside the frame modify by 4 and click delete on your keyboard making sure you are on the sand layer.
Add the mermaid of your choice from the kit and mirror/resize to your liking and place her on top of the sand.

Click onto the sand layer and add the palm tree, i resized this by 70% x 3.

Add other elements to your liking look at my example for placement.

Finally add paper 11 as a new layer directly above the bottom layer and add a mask of your choice. I used vix mask 44.

Add you name and (c) info and save as a jpeg. Remember if you are are using the same tube as i have you must add the scrap kit maker as the (c) otherwise make sutre you add the (c) of the artist you choose to use if this is a pay for artist make sure you have the correct licence to use their work. :)

This tutorial was written by Steffy on 13/06/09 and is completly outta my head, so if there are any others out there thats just a coincidence. Please feel free to text link ONLY to this tut, and send people here to do the tut no part of this tut can be copied to another site wothout my express permission.


Thursday, June 11, 2009

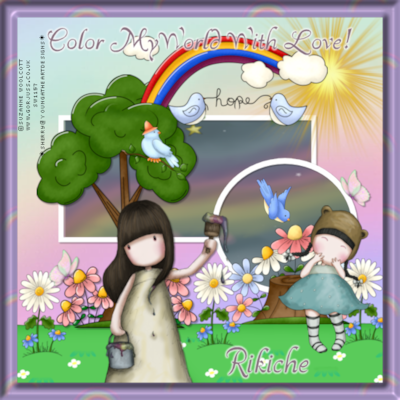
New tut with our template!


Heres a new tut "Color my world with love" written by Sherry from Young at heart designs.


You can find the tut and lots more of her gorgeous tutorials HERE.

Saturday, May 30, 2009

Spank Me!

SPANK ME!!!

Photobucket

I am using the awesome work of Rion Vernon aka Pinuptoons his work is only available from CILM do not use this tube without the proper licence thanks


Supplies needed

Template 75 by Blissfully Beth’s available HERE


Scrap kit is Love Lust by Weescotslass available HERE

Onto the tut


Open the template in psp shift +D and cross of the original. Delete the (c) layer.

Starting at the bottom, (ignoring the Background layer lol)


Use the following instructions for the template layers named –
Dashed circle
Lg grey circle bg
Sm lt greycircle bg
Sm lt grey circle bg
Grey rect bg


Selections ~ select all ~ selections Float ~ Selections Defloat.
Copy the paper of your choice and paste as a new layer selections ~ invert and delete making sure you are on the paper layer.


Then delete the original layer and add a drop shadow to the paper layer i used 2,2,50,5 black.


Leave all the frames as they are and just add a drop shadow to them for my settings see above.
Now find the large circle selections ~ float ~ selections defloat ~ add a close up of your tube as a new layer selections ~ invert and press delete on your keyboard.


Then change the blend mode to Luminance Legacy.


Find the Spank Me layer selections ~ select all ~ selections float ~ sections defloat ~ selections modify contract by 3. Layers new layer flood fill with a light colour, selections none, then merge these 2 layers together, and add the same drop shadow.


Finally go to the background layer add a paper and mask of your choice
Add your tube, then any (c) and your name.
Resize to your liking.
Save as a jpeg


I hope you enjoyed this quick tutorial, it was written by Steffy on the 30th May 2009. It was written for my Daughter for her birthday lol cos I’m tight
DO NOT copy elsewhere but feel free to text link only to this tutorial.

Saturday, May 23, 2009

Summer Sunshine New Kit

Photobucket
Photobucket

Photobucket

Dont ask me why the previews are different sizes cos i have no idea lol blame PSP and PB oh and maybe me being blonde lol

Not all elements are shown

Download HERE

Monday, May 18, 2009

Girly Template Freebie

I was playing around in psp and came up with this fun girly tag template.

I hope you have fun with it and as always i'd love to see your creations!


Download here.
Its much bigger in reality i just resized it to post up here :]

Bouncy Balls

Bouncy balls
Photobucket

i has to squash this up a bit to fit on the blog it is not block in fulll size :)

I am using the awesome artwork of Rion Vernon aka Pinuptoons, only available at CILM, please do not use this tube if you do not have a licence to do so.

Scrap kit used is by VooDoo4u2nv
called Sandy summer HERE

My supplies are HERE


This tutorial assumes you have prior knowledge of psp and animation shop.

ONTO THE TUT
Open the scrap kit and my supplies in psp and the tube you wish to use, open my beach scene duplicate + shift and save the original in case you want to use it again.
Paste your tube as a new layer, go to the scrap kit, and find the beach ball, re size to you liking and paste on the girls hand so it looks like she is bouncing the ball, duplicate this layer and move down a little repeat this step until the ball is touching the sand.

Find the tiki hut and other elements from the scrap kit you wish to use, re size to your liking and add as you feel looks best please refer to mine for placement if you require.
Find the sun from my supplies at add at the top right hand corner.

Add your name and the (c) info as new layers.

TO ANIMATE

X out all the ball layer except the top one that is at her hand, edit~ copy merged ~edit pate as a new animation in AS, X out this layer and paste the next one after the current frame, repeat this until u have X’d out all layers and pasted them to the sand.
Back to psp and repeat your last paste, then X that one out and un X the one above repeat this until the ball is at her hand again.
Are you still with me lol.
Still in AS animation ~ frame properties and change the very last frame to 50 . Resize to your liking and save.


This tutorial was written by Steffy of http://www.thefishqueenandprincessofpinkdopsp.blogspot.com/
On the 18-05-09

I hope you enjoyed this tutorial as much as I did making it. Please do not copy this tutorial anywhere else on the internet or claim as your own, any resemblance to others is a coincidence. Feel free to text link only to this tutorial but please DO NOT hotlink.

Sunday, May 17, 2009

Perfect Pisces

Perfect Pisces
Photobucket

I am using the awesome artwork of Lindsay Cibos her work is only available from CILM please do not use this tube without a licence, she also does many other star signs :)
This tutorial presumes you have prior knowledge of psp and its workings, I used psp 9 to write this tut, but I can’t see why it can’t be done in other versions, this is a quickie :)

Scrap kit by Bel Vidotti Called Sea Life HERE

My supplies HERE


Onto the tut


Open a new image 600X600 flood fill in white.

Add sealifeframepebble as a new layer and re size by 80%


Add my inner as a new layer place under the frame.

Copy and paste bubbles 3 as a new layer place at the right hand side of the frame duplicate and mirror.

Add your Tube as a new layer and place in the centre, of the frame. Resize elements and add to your liking as new layers.

Add a drop shadow to all layers. (I used 2,2,50,5 black )

Go to the bottom layer add paper 9 as a new layer then apply mask cbj_05 use your deform tool to fit it around the tag.

Add my word art as a new layer on the top layer. Then add your © info and your name, save as a jpeg and resize to your liking.


This tutorial was written by Steffy of thefishqueenandprincessofpinkdopsp@blogspot.com on the 17.05.09 and is totally out of my own head, if anyone has made one similar then it’s not my fault. Do not share the zips included here but send people here to download them from here, fell free to text link ONLY to this tut, do not hotlink! Thank you

Friday, May 15, 2009

Sweet Dreams Baby girls tut from our scrap kit

Ladylove from Fantasy flight Graphics has written a fab tut usng Laura's Perfectly Pink Kit.


Find the tut HERE

and her blog HERE

Tuesday, May 12, 2009

New Freebie kit - Pink Perfection

Today i have a brand new pink and girly kit for you.
Im suprised its taken me so long to get a pink one made being the biggest pink fan ever lol
Hope you like it and as always if you create anything with it i'd love to see it!
Oh and try to forgive my awful previews im not very good at them hehe but all the items are tagger sized and saved as .png's. No drop shadow on any element or frame except for preview purposes :].

Papers
Photobucket
Elements (not all shown) Hidden in the top of this are some ribbons and ric racs.

Photobucket
Frames and glitters

Photobucket
Download here.

Thursday, May 07, 2009

Catch a falling star - Template

I lurve stars! So heres my new starry template. I hope you like it.
And if you make anything with it i'd love to see it!
Photobucket
Download Here

Monday, May 04, 2009

Here comes summer Scrap Kit

Photobucket


Photobucket
Download HERE

Sunday, May 03, 2009

Colours of the Rainbow

Colours of the rainbow
This is what we will be making
Photobucket
Or this if you animate
Photobucket

I am using the art of Andrea Young which was a freebie from CILM at Christmas; please do not use this image unless you have a licence to do so.

Template by me HERE
Muras clouds
HERE
Beckys mask 033
HERE
Xenoflex2 constellation (if animating)


The TUT

Download the supplies and open them in psp, canvas size 600X600. shift+D to duplicate my template, then close the original, delete the (c) layer and the background layer, add a new layer in its place and use a nice blue colour I used #30baf7 apply mura’s clouds with these settings

Photobucket


When u have applied this add mask and deform until it fits the tag nicely.


Select the rainbow layers one by one... selections ~ select all~ selections ~float ~selctions ~defloat then go selections ~modify expand by 1... new layer and floodfill with a rainbow gradient of your choice. Do this till all the rainbow layers are filled then delete the original layers.

Then add a drop shadow to each layer I used 1, 1, 50, 2 colour black.


Add your tube resize to your liking, and ad a drop shadow of 5,5,50,5 black to the tube.

Move the word art up slightly so the tube doesn’t hide it lol

Add your name and (c) info resize to your liking, and save as a Jpeg.


If you wish to animate read on

Merge all the rainbow layers together then duplicate x2 so you have 3 layers.
On the bottom layer apply xenoflex 2 constellation with the settings below

Photobucket

Then apply to the middle layer but hit the random seed button a couple of times, do the same for the top layer.


Then x off the top and middle rainbow layers, edit copy merged, go to AS paste as a new animation, X out that layer in psp and un X the middle layer then edit copy merged AS paste AFTER current frame then do the same again for the top layer, don’t forget to resize the animation, and save.


This tutorial was written on 28-03-09 by Steffy
It was inspired by my own template and is totally my own work, if it resembles any tutorial on the net then that’s a coincidence and not intentional
Please do not share the supplies online but send people here to download them.
Feel free to text link this tutorial, I would love to see your results, so please email them to us at the addy’s to the right :) We will soon be having a tut show off page and we will add them all there.
Thanx for trying this tutorial.

Friday, May 01, 2009

Cord 'n' Lace - Freebie kit

This is my latest scrap creation in funky colours with a bit of a textured feel to it.
I hope you like it and as always if you do make something with it, i'd love to see it!

Photobucket Photobucket
Photobucket

Not all elements are shown in the preview as i couldnt fit them in lol

Download Here :)