
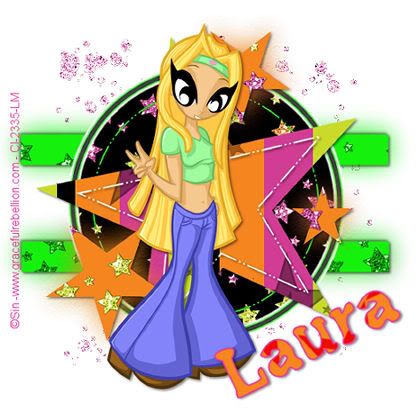
I am using the awesome artwork of Sin
Available only from CILM please ensure you have the correct licence to use this artist feel free to use another artist/tube.
Plugins required to do this tut
Eyecandy 4000 Gradient glow
Art media effects – comes with psp 9
SUPPLIES
Starry eyed scrap kit from melissazcreationz HERE
ONTO THE TUT
Open your template, Shift + D to duplicate now save your original one for use later.
Delete the (c) layer. Re-size to 650X650 u will see the background layer now needs a bit of extra filling so do so in white.
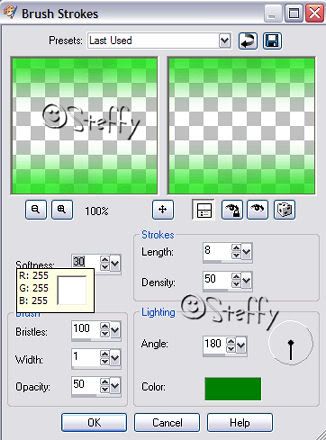
Find the rectangles layer selections~ select all ~ selections ~ float ~ de float, add a paper fop your choice as a new layer, and colourise to match your tube (if needed.) Duplicate this layer then click on the original rectangles layer, go to adjust ~ blur ~ gaussian blur ~ Radius of 15. Then go to effects art media effects ~ brush strokes with these settings .
Then add a drop shadow of 2,2,50, 5 black to the top rectangle layer not the one u just blurred, repeat this drop shadow but change the settings to -2,-2,50,5, black.
Find the circle layer selections ~select all ~ selections float ~ de float add another paper as a new layer selections~invert ~ click delete on your keyboard to get rid of the paper and just leave it inside your circle, then delete your original circle layer.
Find the dotted circle layer sections select all selections float de float then floodfill in a colour of your choice.
Find the smaller stars layer selections float defloat and add a paper of your choice delete the original layer. Duplicate this layer, and bur as above, and add the art media effect as above changing the colour to suit your tag then Add a drop shadow of 2,2,50,5 black to the top layer.
Finds the LG star selections select all float and defloat adding another paper selections invert and click delete, then add a drop shadow of 2,2,50,5 to this layer. Find the stars dotted layer and add the same drop shadow
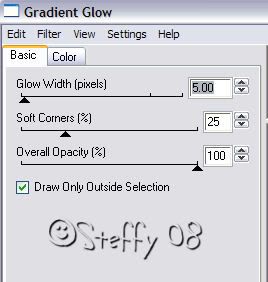
Find the circle frame layer and go to effects ~ plug ins eye candy 4000, gradient glow, and use the settings below.

Go the very bottom layer and add raster 23 from the elements as a new layer.
Click on the very top layer and add your tube as a new layer add drop shadow as before, add your name and (c) info, re size to your liking.
I hope you enjoyed this new tut written by Steffy of thefishqueenandprincessofpinkdopsp.blogspot.com. On 20/06/08
It was entirely outta my head so if it’s similar to others then no problem I have a weird way of thinking lol,
Please do not copy this tut in any part anywhere on the net without my express permission, BUT feel free to text link ONLY to this tut in your group, do no copy and paste my example cost that’s bandwidth theft.


0 comments:
Post a Comment