
Always Aquarian
I used the awesome artwork of Rion Vernon who’s work is only available under licence from CILM. Check out his work I think its totally awesome!
This tutorial assumes you have knowledge of psp
SUPPLIES NEEDED
Tube of your choice
My Template HERE (in supplies)
Eye Candy 5 nature
Mask krd-mask9 (in supplies)
My supplies HERE
Ok onto the tut :)
Grab my template shift+D to duplicate then save the original in case you want to use it again :)
Click on raster 1 add a new layer and fill with a lightish colour from your tube, floodfill this layer and apply mask. Resize by 80% then deform till it fits to your liking.
Go to the inner layer selections ~select all~ Selection float ~ selections defloat selections~ modify expand by 2 add a new layer and flood fill with a darker colour from your tube, DO NOT deselect yet, delete the inner layer and duplicate the selected layer X2 so you have 3 layers still selected.
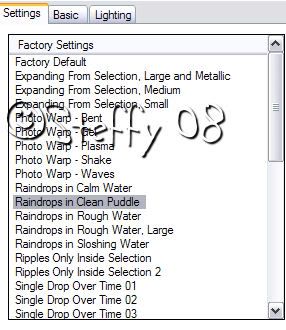
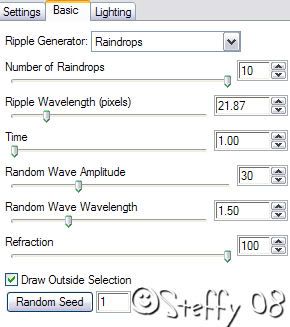
Go to the bottom selected layer and apply Eye candy 5 nature Ripples with these settings.
Selctions ~ invert delete. This will remove the excess on the filter.
Go to the middle layer click the random seed button and apply, again delete the excess, and do the same for the top layer, you should now have 3 layers with different settings of ripples. You may deselect now making sure u have deleted on each layer.
Click on the outer layer and add a drop shadow I used 5,5,50,5 black (cos this is my fav setting lol)
Add your tube and drop shadow as above.
Clcik onto the word layer and selections ~ select all ~selections~float ~ selections defloat, flood fill with a nice blue colour to match I used the same colour I had used to fill the inner layer. Add a drop shadow.
Add your name and (c) info.
Now to animate
X off your top and middle ripple layer copy merged, open AS paste as a new animation, back to psp X off that layer and un X the middle layer , copy merged AS paste AFTER current frame, back to psp X out that layer un X the top layer and paste AFTER current frame.
Stil in AS edit select all ~ animation ~ resize to 85% ~animation again frame properties and change that number to 25. Then save hey presto a new tag!
This tutorial was written by Steffy 30-03-09
It was out of my head and any similarities to other tuts is purely coincidental. Do not copy any part of this tut and claim it as your own as it isn’t it’s mine :)
Feel free to make a text link to this tutorial but do not copy and paste
Thanx


0 comments:
Post a Comment