
Typical Taurus
A tutorial written by Laura aka Pink Princess on march 29th 2009.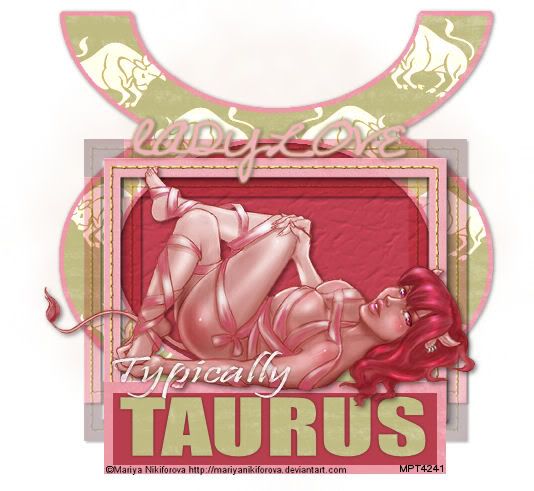
For this tutorial you will need -
My typical taurus template included in the supplies.
A tube of choice. Im using a gorgeous taurus tube from Mariya Nikiforova if you want to use the one im using you must purchase it from MPT first.
A scrap kit of choice or the one im including which is Dusty Delights by Fee of Scrappy Dayz.
Or if you prefer just choose some colours to match your tube :].
Toadies - what are you.
Font of choice or the one im using which is a freebie called "Never let go" included in my supplies.
Optional for your name/text - Eyecandy 4000 gradient glow.
My supplies.
Ok on to the fun stuff!
Open your supplies in psp and open up the tube your going to be using.
Activate the template and press shift+D to duplicate. Close the original and delete the info layer from the remaining one.
Activate the inner circle layer, select all, float, defloat, expand by 1 and floodfill a dark colour from your tube. Deselect.
Activate the taurus frame layer, select all, float, defloat, expand by 2. Copy and paste paper 1 from Fee's kit as a new layer (or a paper of your choice). Selections, Invert, hit delete on the paper layer. Deselect. Delete taurus frame layer.
Activate the inner taurus layer. Select all, float, defloat, expand by 1. Copy and paste paper 4 from the kit. Selections, invert. Press delete on the paper layer. Deselect. Delete inner taurus layer.
Follow the same steps above for the rectangle inner, rectangle outer and TAURUS layers. Either copying and pasting papers or floodfilling with complimentary colours.
Ok now activate the bull layer. Colourise him to match your frames, i made mine a nice deep pink like the inner circle.
Resize him by 84% once, and again if he looks a bit big lol i forgot how many times i resized, but it wasnt more than twice. Now duplicate this layer a few times so you have bulls all inside the inner taurus frame. Mirror a few for prettyness. Then merge all the little bull shapes together. Once merged move this layer down so its just above the inner taurus frame.
Activate the inner taurus frame and select all, float, defloat, expand by 1, invert. Activate the bull layer and press delete. Deselect.
Change the blend mode of this bull layer to dodge.
Copy and paste your tube as a new layer. If your using a laying down tube like mine place it so its above the TAURUS text layer but below the typically layer. Resize to your liking and add a drop shadow of choice. I used H+V 2 opacity 52 blur 6 black.
Go back to the scrap kit, copy and paste a frame of choice, i chose the pink one :].
Image, rotate, free rotate, left 90.
Resize it by 86% and place it as mine.
Duplicate this layer and on the original, not the duplicate go to Effects, Toadies, What are you? with both X and Y on 20.
Activate the Typically layer, select all, float, defloat, expand by 1 and then change your foreground to either a patern paper or a colour of choice and activate your brush tool. Brush in gentle strokes over the selected text. Dont cover all of it yet. Change your foreground to a complimentary colour/paper/pattern and repeat the brushing until all the text is covered.
Now add your © info and any license numbers needed.
Add your name/text and resize/crop to your liking.
Add drop shadows to frame layers and any others you like.
If you feel it looks naked without a mask feel free to add one now :].
Thats it we're done!
I hope you enjoyed this tutorial and thanks for giving it a go!
Sunday, March 29, 2009
Typical Taurus Tutorial
Subscribe to:
Post Comments (Atom)


0 comments:
Post a Comment