
This tutorial assumes you have a working knowledge of psp and some of its tools.
To complete this tutorial you will need;
A tube of choice. Im using the gorgeous art work of David Boller www.tuskentertainment.com .
To use his art you must purchase a license from Up Your Art first.
Mura's Meister Copies
Alien skin Xenofex 2 constellation (optional as its only for animation)
Font/s of choice
and
My supplies which can be found here :].
Open a new image 650x650 transparent canvas. Floodfill with white.
Open the scales and sky cloud from my supplies and minimise the sky cloud for now.
Copy and paste the scales onto the canvas and go to mura's copies.
Select Encircle and apply as below -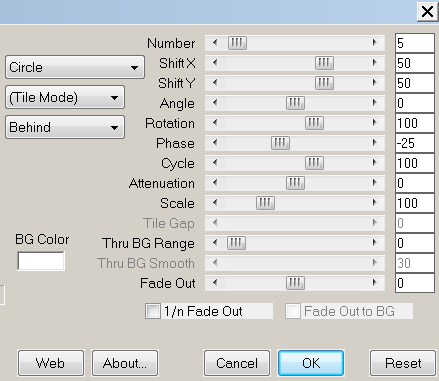
Choose a nice pastel colour from your tube as your background. Foreground on nil.
Grab your preset shape tool set on circle and draw out a medium sized circle on your canvas and move below the scales layer. Ensure the edges of the circle meet with the top line of the scales and then convert to raster. If the circle is too small or too big play about with the nodes until its the right size before converting.
Go to Adjust, Blur, Gausian blur with a radius of 8-10 depending on the colour you selected, apply.
Repeat.
Copy and paste the skycloud on to your canvas and duplicate. Keep one at the top and X it out.
Move one below your blurred circle layer. Duplicate this a few times until you have covered all the edges of the circle with it. You might want to rotate or mirror the duplicates to get a better difference around the edges.
Copy and paste your tube as a new layer. Move it below the top sky cloud layer and un X that skycloud now.
Duplicate the skycloud and then flip and mirror it. Place the duplicate next to the first to cover the lower section of your tube. Merge these two visable.
Hide all layers except for the lower sky cloud layers. Merge them visable. Add a drop shadow of choice in WHITE.
Un X all other layers.
If your animating your tag follow the next steps if not please skip them and go straight to the text addition further down.
Activate your tube layer and duplicate for a total of 4.
X out the bottom one and the top two. With your remaining tube layer active go to xenofex 2 constellation and apply with the following settings -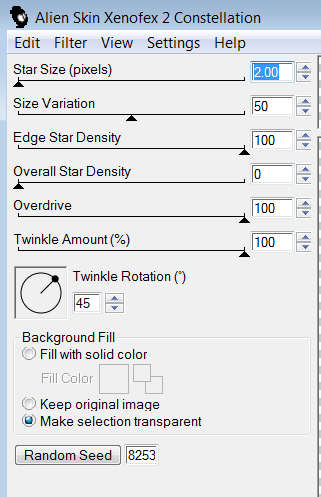
Repeat this for the next two higher tube layers pressing random seed once each time.
X out all xenofex layers.
Join back here if you skipped the animation.
Activate the top layer in your canvas and grab your preset shape tool set on elipse. Line width of 5, background nil, foreground black.
Draw out a circle lining it up with the outside of the scales. Dont convert to raster!!
Grab your text tool and hold your cursor over the elipse you have just drawn until it changes into an A and then click, choose a font , change the foreground and background to gold or any other colour of choice and type out your title, I wrote Lustrous Libra.
When done Click the + in your layer pallette next to the vector layers and X out the elipse layer. Right click the text layer, Convert to raster.
Use the same method to add your copyright and if needed license info and taggers mark if required.
Change your foreground and background to the same colour as your inner circle and type out your name over the skycloud layer in the lower part of the tag. Once satisfied with it convert to raster and add a gradient glow or drop shadow of choice to the text.
Drop shadow any other layers you want to and resize all layers to your liking.
If you arent animating save your tag in your preferred format and thank you for trying my tutorial :].
If you are animating un X the first xenofex layer and right click the top bar of your image, copy merged, over to animation shop, paste as new animation.
Back to psp, X out the first xenofex layer, Un X the middle one, copy merged, into animation shop, paste after current frame.
Back to psp again, X the middle xenofex layer, Un X the top one, copy merged, into animation shop, Paste after current frame.
Right click view animation, save as .gif and your done!
Thanks for trying my tutorial and please if you do complete it share your results as id love to see them!!
This tutorial was written on April 13th 2009 by Laura.
Please do not repost or translate without my express permission.
Items in my supplies are not to be shared outside of this tutorial although you may use them for yourself.
If linking please use a text link. Do not hotlink to our pictures - thanks :].


0 comments:
Post a Comment